 PDF")
By Traci Bunkers
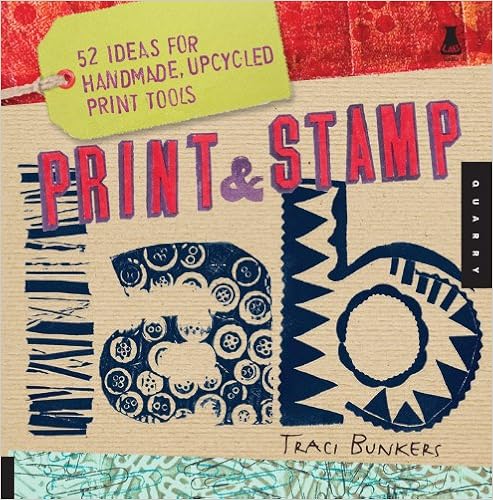
Quick preview of Print & Stamp Lab: 52 Ideas for Handmade, Upcycled Print Tools (Lab Series) PDF
Similar Crafts books
A Hot Glue Gun Mess: Funny Stories, Pretty DIY Projects
During this appealing paperback variation that includes French flaps, highly well known way of life blogger, YouTube celebrity, and dressmaker Mr. Kate (Kate Albrecht) deals a gorgeous choice of step by step own type and residential projects—woven in with quirkily hilarious tales and anecdotes. Do you dream of discovering how one can infuse home made initiatives into each point of your lifestyles and feature enjoyable doing it?
Build Your Own Quadcopter: Power Up Your Designs with the Parallax Elev-8
Construct a customized multirotor plane! construct and customise radio-controlled quadcopters that take off, land, hover, and start. construct your personal Quadcopter: strength Up Your Designs with the Parallax Elev-8 positive aspects step by step meeting plans and experiments that may have you ever launching totally functioning quadcopters very quickly.
The Basics of Corset Building: A Handbook for Beginners
Think about a corset as a clean canvas. Linda Sparks' the fundamentals of Corset construction: A guide for novices is a complete advisor to development your first corset, including:Section One: instruments and fabrics for Corset BuildingDiscusses the instruments you will need, plus kinds of metal, plastic, and textiles.
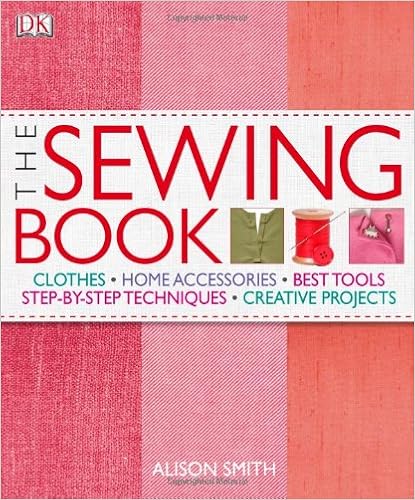
The Sewing Book: An Encyclopedic Resource of Step-by-Step Techniques
This is often the single stitching booklet you are going to ever desire. each software and each procedure you require for making your house furniture or garments is heavily and sharply photographed, rigorously annotated, and obviously defined. The instruments part starts with the elemental toolkit, starting up into every little thing you can want - all sorts of slicing software and computing device foot is proven.
- Sewing for a Royal Baby: 22 Heirloom Patterns for Your Little Prince or Princess
- Huge & Huggable Mochimochi
- Printmaking Unleashed: More Than 50 Techniques for Expressive Mark Making
- Elite Weapons for LEGO Fanatics
- I Just Like to Make Things: Learn the Secrets to Making Money while Staying Passionate about your Art and Craft
- Mastering Color Knitting: Simple Instructions for Stranded, Intarsia, and Double Knitting
Extra info for Print & Stamp Lab: 52 Ideas for Handmade, Upcycled Print Tools (Lab Series)
Pass this step if you would like a cut-out form with no layout drawn within it. ) three. lower out the periphery of your layout. four. reduce the bottom to the specified dimension. five. disguise one aspect of the bottom with double-stick tape and trim. 6. Press the froth form at the adhesive, being cautious to not harm the outside. 7. Press the froth block at the stamp pad or right into a layer of paint rolled onto the Plexiglas and stamp onto the paper. Cardstock was once first stenciled utilizing various colours of paint with a plastic basket (Lab 48), after which published utilizing the froth plates with black, magenta, and gold paint. The small megastar was once additionally stamped utilizing a crimson stamp pad. advice • if the paint is just too thick at the Plexiglas, it's going to clog up parts of the layout and won’t exhibit while revealed. • if utilizing foamcore for the bottom, trim off the surplus edges to enable you place while printing. it will dispose of components of the bottom printing, yet it’s most unlikely to maintain this from taking place as the foam is so skinny. Stamped utilizing paint. Pri nti ng Bl o c ok s & s tam playstation 042-063_15854. indd sixty one 042-063_15854. indd sixty one sixty one 11/23/09 6:48:24 PM 11/23/09 6:49:16 PM textual content (RAY) Job:11-15854 Title:RP-Print&Stamp Lab #175 P DTP:216 Page:61 LAB 21 Carved Novelty Erasers IT’S enjoyable To carVE your individual STampS. the easiest half should be utilizing reasonably cheap erasers for the carving fabric. novelty erasers not just have designs published on them but in addition are available enjoyable shapes, in multiples, and will be present in the greenback shop. This makes it so easy as a way to carve your personal stamps yet don’t be aware of what to carve. simply stick with the broadcast layout! If the picture imprinted on the eraser is just too complex, simplify it by way of carving basically the most shapes. do not forget that what's carved away won't print, and what isn’t carved will. begin with anything basic to your first stamp to get the dangle of it. It isn’t essential to carve very deep, and it’s greater to head slowly. when you reduce to rubble, simply begin with a brand new eraser. fabrics • carving deal with and blade (blades also are known as cutters). The smallest V-shaped cutter (#1) is the most cutter used. the larger cutters are for slicing out backgrounds. (See “Equipment,” web page 18) • novelty erasers • stamp pad • paper Randomly stamped on cardstock with stamp pads. Stamped utilizing a stamp pad. sixty two Pr i n t & s tam P l aB 042-063_15854. indd sixty two 042-063_15854. indd sixty two 11/23/09 6:48:31 PM 12/11/09 11:13:59 AM textual content (RAY) Job:11-15854 Title:RP-Print&Stamp Lab 12-C54231 #175 P DTP:216 Page:62 Instructions 1. preserving the carving device like a pencil, and carving clear of your self, carve an summary round the whole layout at the eraser utilizing the number one blade. 2. after the total layout is printed, attempt the stamp by way of urgent the carved aspect of the eraser at the stamp pad and stamp onto the paper. three. examine the stamped photo and judge what strains have to be wiped clean up. after making any alterations, try the stamp back. four. carve away extra of the eraser, leaving the components you need to print. while carving away the history, a bigger cutter can be utilized.